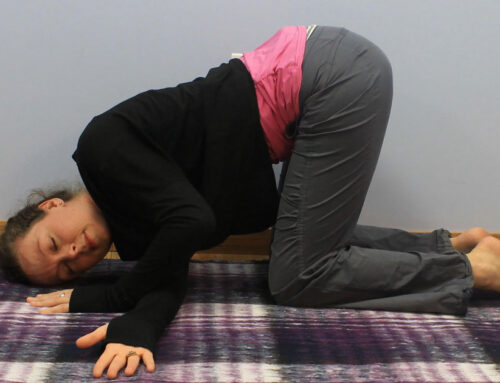
The multifidus muscle group, located along the back of the spine, is an important muscle to train if you are healing pelvic pain and incontinence. The multifidus extends your back when both the right and left column contract, or rotates your spine when one side is contracted.
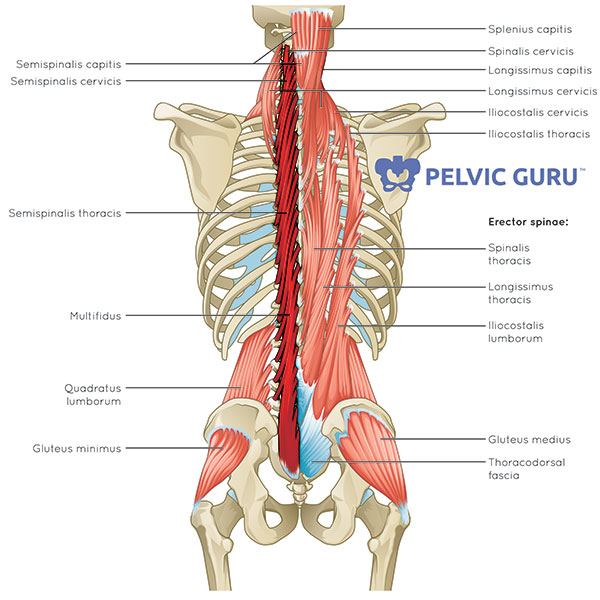
Image courtesy of Pelvic Guru
So, what do your back muscles have to do with your pelvic floor?
Think of your midsection, or core, as a canister of support—a soda can, if you will.1
Imagine the “soda can” as the transverse abdominals in the front, multifidus in the back, pelvic floor muscles at the bottom and diaphragm and vocal cords at the top.
If I toss an unopened soda can across the room, it will not leak. If I create “weakness” by opening the top of the can, or piercing the front/back/bottom, it will leak.
This is why we consider core stability when someone is experiencing pelvic floor dysfunction.
Reasons to add multifidus exercises
If you are working on optimizing your pelvic girdle you may have already been practicing strengthening your pelvic floor muscles for urinary incontinence or lengthening them to mitigate pain.
You may have also started training the abdominal wall with special attention to the transverse abdominals to support lengthening or strengthening your pelvic floor muscles. To round out your program, and support your spinal health, consider adding an exercise to strengthen the multifidus.
Why would you be looking for a multifidus exercise?
- You are working with a pelvic health physical therapist or occupational therapist on recovering from a pelvic pain diagnosis like vulvodynia, interstitial cystitis, or constipation. You are looking to strengthen other aspects of your core so your pelvic floor muscles don’t need to hold on for stability as much.
- You just had a baby, concerned about a diastasis recti abdominis, urinary incontinence, or pelvic organ prolapse.
- You have hip, back, or sacroiliac joint pain and want to optimize your core.
Bird-dog exercise for strengthening multifidus
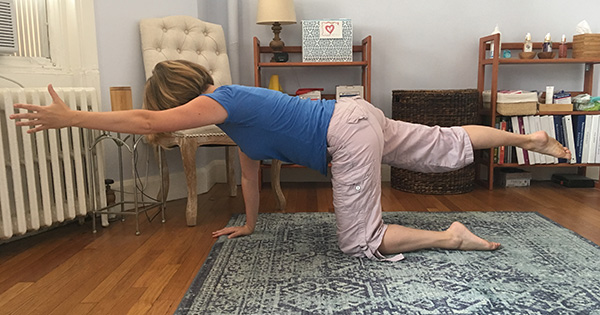
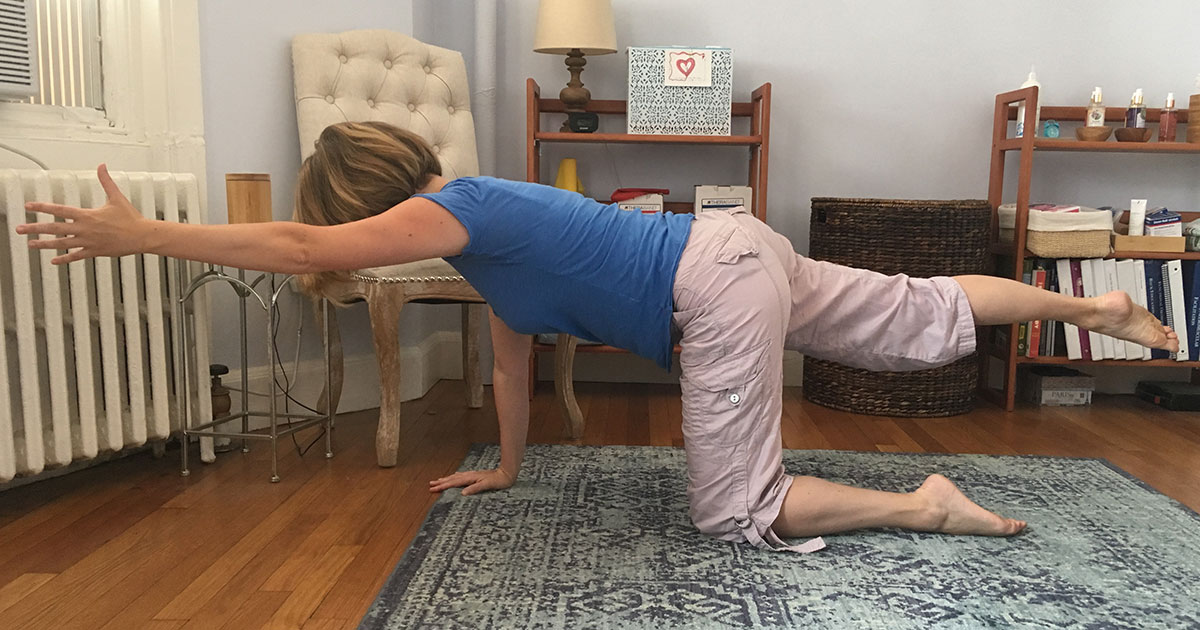
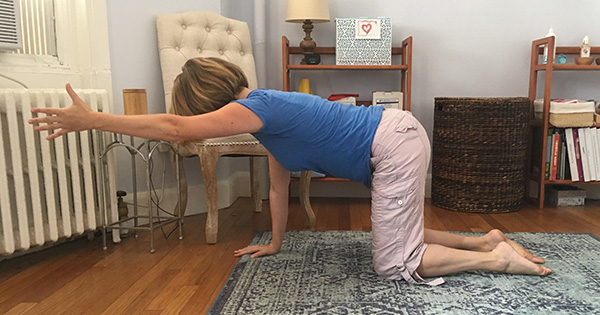
One of my favorite multifidus exercises is alternate arm leg extension, or bird-dog. It’s a great way to work on hip stability, shoulder stability, and abdominal wall control, all of which assist optimal pelvic function.
Very often, especially when I see postpartum women, they have a difficult time stabilizing through their pelvis, abdominal wall, and ribcage. Makes sense! They have had to deal with internal pressure changes, muscles that have been elongated, and scar tissue…not to mention lack of sleep, nutrition and sheer exhaustion!
I find creating modifications so that my patient can transfer weight optimally is ideal. Sure, someone can throw their arm and leg up and count to ten, but if we can exercise specifically and mindfully, the work can go even deeper.
Here is how I like to progress people. This may take place over the course of a few or many visits…however long it takes to gain strength, motor control, and stability.
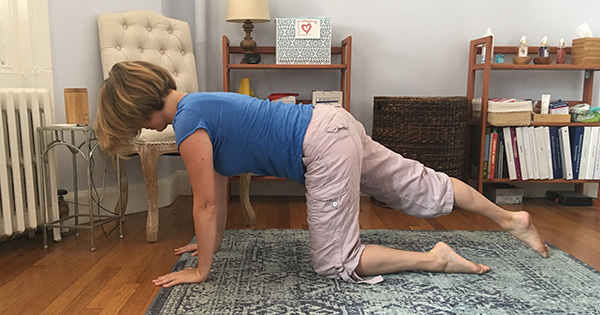
Starting position
Start in tabletop position. Be sure that your hips are right under your pelvis and your hands are right under your shoulders.

Pull your lower belly in and soften your elbows. This will prevent you from hyperextending your elbows and ask your shoulder blade muscles to work harder.
Arm lift
- Lift the left palm of your hand so that your fingertips are tenting. If you shifted your ribs or pelvis, try again.

- Lift your left arm forward, with your thumb to the ceiling and shoulder blade down your back. If you shifted your ribs or pelvis, try again. If you are unable to keep your abdominal wall compressed, stay with the tenting of fingers option until you are able to control your trunk and pelvis, especially if you are rehabbing a diastasis recti abdominis (DRA).
Leg lift
- Draw your right leg back so your toes are touching the floor. If you shifted your pelvis to the left, bring it back to center.
- Keeping your lower belly compressed and spine neutral (not arching the back), lift up your right leg. If you shifted your pelvis to the left, bring it back to center. If you can’t avoid the shift, stick with the first option.
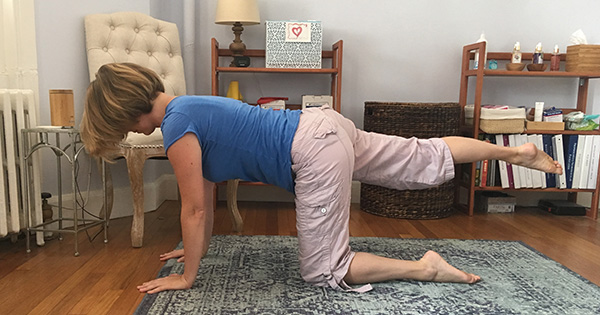
Try arm and leg extension together
- Bring your right arm forward and left leg back. Imagine you are as long as possible between the top of your head and your tailbone. Be careful that you aren’t shifting your weight, sinking between the shoulder blades, or hyperextending your elbows.
- Want to increase the intensity? Drift your leg out to the side a few inches and back. This activates your outer hip muscles (hip abductors) and increases the lever arm, asking your abdominals to work harder.
The grand finale!
While you are in tabletop, you may as well go for a plank prep! Take a breath in, exhale compressing the lower belly, and lift and hover your knees.
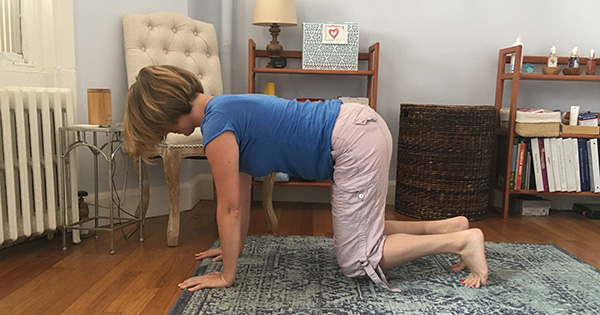
If you find that you are bulging your abdomen, you can start by activating the muscles: press the palms of your hands into the floor and imagine you are lifting your knees.
- This model was first proposed by Mary Massery, a world-renowned pediatric physical therapist, who discovered that postural control is heavily influenced by the diaphragm and vocal cords. She encouraged physical therapists to think beyond the traditional thoughts of what “the core” is.
Valuable content. Thank you!!
Great descriptions on how to be aware of your body if you practice stretches or strengthening exercises of yoga especially because its so popular and its more likely if someone is new and doesn’t have much of an education about the human body that the motions would happen but not intent.
These are simple and effective ways to stabilize the core without buying a gym membership or the like.
So glad you found this post helpful!